How to Make a Pillow Fort on Your Bed: Easy Guide
Quick Answer
To make a pillow fort on your bed, use the headboard and mattress as the base, build low walls from firm pillows and cushions along the sides, drape a light flat sheet over the top for a roof, and hold it in place with clips, books, or tucked edges. Keep the entrance open, leave space to breathe, and use battery lights only. The whole build takes about 10 to 15 minutes.
A bed is one of the easiest places to build a pillow fort. The mattress is already soft, the headboard gives you a ready-made back wall, and the edges of the bed give the structure a clear shape. You do not need special equipment, a large room, or a complicated frame.
The trick is not to pile up as many pillows as possible. A good bed fort is low, wide, and stable. It should feel enclosed without feeling closed in, and it should stay up when someone leans against it, reaches for a book, or shifts position to get comfortable.
What You Need Before You Start
Start with what you already have. Most bed forts work best with a mix of firm pillows for structure and soft pillows for comfort. Firm cushions hold their shape. Soft, floppy pillows collapse easily, so save those for the floor and the inside of the fort.
For a basic fort for one or two people, gather:
- 4 to 6 firm pillows or sofa cushions for the walls
- 2 to 4 soft pillows for sitting and lounging inside
- 1 large, light flat sheet for the roof
- 1 or 2 blankets for the floor and extra warmth
- 4 to 6 large binder clips, clothespins, or chip clips
- 2 heavy books or small weights to anchor the sheet
- 1 small battery-operated light, torch, or LED fairy lights
A flat sheet makes a better roof than a heavy blanket. A heavy blanket pulls the walls inward, sags in the middle, and makes the fort more likely to collapse. A light sheet stays up more easily and lets a little air and light through, which makes the space feel less stuffy.
If you are choosing pillows for the walls, size matters. A standard bed pillow is usually wide enough to form a solid wall section, while a smaller throw pillow works better as a gap filler or a corner support. Mixing sizes is useful, as long as the largest, firmest pillows go at the bottom.
Choose the Right Bed Fort Design First
There are three designs that work well on a bed. Pick one before you start moving pillows, because each one uses the bed in a slightly different way.
The headboard tunnel is the simplest. The headboard forms the back wall, pillows form the two side walls, and a sheet runs from the headboard toward the foot of the bed. This design is best for reading, relaxing, or a quiet sleepover fort.
The side-wall nest is best for a bed without a tall headboard. Pillows run along both long sides of the mattress, with a lower wall at the foot of the bed. The roof sits lower, which makes the fort feel cosier, but it also leaves less headroom.
The half-bed fort is best when you still need part of the bed open. Build the fort across the top half of the bed only, near the pillows, and leave the lower half clear for getting in and out. This is a good choice for a small bed, a shared bed, or a fort that will only be used for a short time.
| Design | Best for | Headroom | Stability |
|---|---|---|---|
| Headboard tunnel | Reading, relaxing, sleepovers | Medium to high | High |
| Side-wall nest | Beds without a headboard | Low | Medium |
| Half-bed fort | Small beds, short play sessions | Medium | High |
If this is your first bed fort, start with the headboard tunnel. It uses the strongest part of the bed, needs fewer supports, and is the easiest to fix when a wall starts to lean.
How to Make a Pillow Fort on Your Bed, Step by Step

Clear the bed first. Remove anything that will get in the way, such as laptops, chargers, drinks, and loose items that could fall behind a pillow wall. Make the bed roughly flat so the walls sit level. A lumpy duvet under a pillow wall makes the whole structure lean.
Then follow these steps in order. The order matters, because the walls need to be stable before the roof goes on.
- Make the floor comfortable. Spread a blanket or thin duvet across the mattress where you will sit or lie. This protects the sheets, adds warmth, and stops the mattress from feeling bare once the fort is up.
- Use the headboard as the back wall. Push the bed against the headboard if it has moved away from the wall. Place one or two soft pillows against the headboard for back support. This is your main sitting area.
- Build the side walls low and wide. Stand firm pillows on their long edges along both sides of the bed. Place the largest pillows at the bottom and lean them slightly inward, toward the centre of the bed. A wall that leans inward a little is more stable than one that leans outward.
- Fill the gaps. Use smaller cushions, folded blankets, or rolled towels to fill gaps between pillows. Gaps are usually where a roof sags or a wall starts to slide.
- Add a foot wall if you want an enclosed fort. Place one or two pillows across the foot of the bed, but leave a clear opening on one side. That opening becomes the entrance. A fort with no clear entrance is awkward to use and harder to leave quickly.
- Drape the roof sheet. Lay the flat sheet over the top of the walls, from the headboard toward the foot of the bed. Keep the sheet fairly taut, but do not pull it so tight that it drags the walls inward.
- Anchor the sheet. Clip the sheet to the top of the headboard, to a pillow edge, or to a bedpost if you have one. At the foot end, tuck the sheet under the mattress or place a heavy book on each corner. Anchoring two opposite corners is usually enough.
- Test the fort before you decorate it. Sit inside, lean gently against each wall, and reach for something at the far end. If a wall moves, lower it, add a firmer pillow behind it, or move the roof anchor closer to that wall.
- Add comfort, not weight. Put soft pillows, a folded blanket, and a book or tablet inside. Keep heavier items on the mattress, not on the roof.
- Add light last. Place a battery torch or LED lights inside, away from the sheet. Leave the entrance partly open so air can move through the fort.
Most people try to build the roof too high. A lower roof is easier to support, feels warmer, and is less likely to collapse. If you want more headroom, raise the roof by using taller pillows at the headboard end and shorter pillows toward the foot, creating a gentle slope instead of a flat, high ceiling.
Tip
Build the fort in layers: floor, then walls, then roof. If a wall falls, fix that wall before adding the sheet. Adding the roof first hides the problem instead of fixing it.
How to Make the Roof Stay Up
The roof is the part that fails most often. It usually fails for one of three reasons: the sheet is too heavy, the walls are too far apart, or the sheet is not anchored.
Start by shortening the span. If the bed is wide, do not try to cover the whole width with one sheet. Build the fort across two-thirds of the bed instead, or bring the side walls closer together. A shorter span needs less tension and puts less pull on the walls.
Next, use the lightest sheet you have. A cotton flat sheet is usually ideal. A fleece blanket, a thick duvet, or a heavy throw adds weight in the middle, where there is no support. If you only have a heavier blanket, use it on the floor instead and save the sheet for the roof.
Clips make a big difference. Binder clips grip a sheet and a pillow edge well. Clothespins work on thinner fabric, but they can slip if the sheet is pulled tight. If you have no clips, tuck the sheet tightly under the mattress on one side and under a heavy book on the other side.
A simple centre support can also help. A tall pillow stood upright in the middle of the bed, a rolled blanket, or a lightweight broom handle laid across the two side walls can hold the sheet up in the centre. Do not use a heavy or sharp object as a centre pole, and do not tie anything around a child’s neck or body to hold the fort up.
If the roof keeps sagging in the middle, lower the whole fort. A low, stable fort is more fun than a tall fort that collapses every few minutes.
Making the Inside Cosy Without Overfilling It
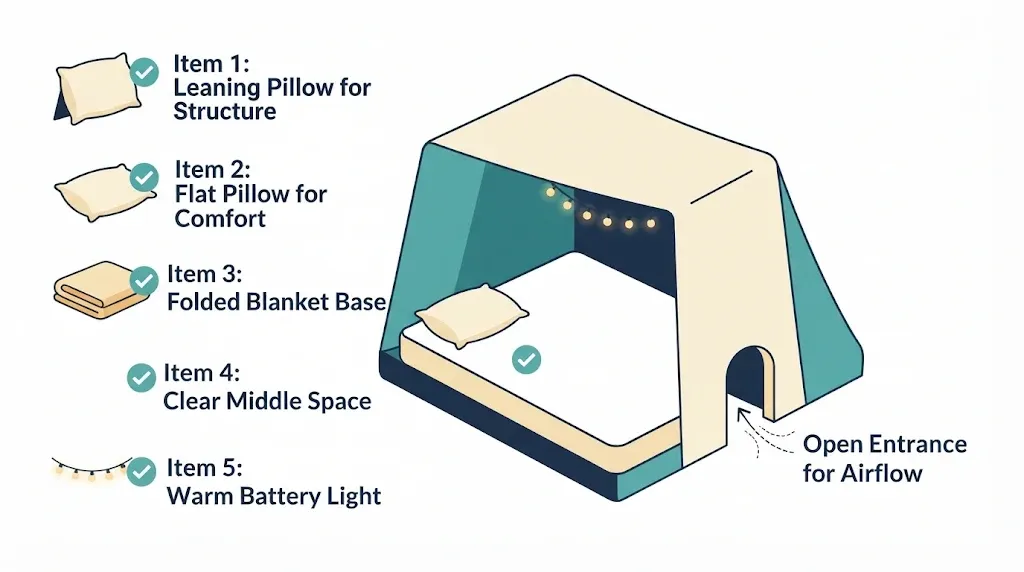
Once the structure is stable, the inside is about comfort and light. Keep it simple. Too many pillows inside the fort leave no room to sit, and too many blankets make it hot.
Place one soft pillow at the headboard for leaning back, one flat pillow for lying down, and a folded blanket within easy reach. Leave a clear space in the middle for a book, a tablet, snacks, or a game. If two people will use the fort, plan the seating before you add extra cushions.
Light changes the whole feeling of a fort. A warm, soft light makes the space feel calm. A bright white light can feel harsh under a sheet. Battery-operated LED fairy lights, a small torch pointed at the sheet, or a phone torch placed face-down on the mattress can all work. Fairy lights for a dorm room follow the same idea: keep the lights low, battery-powered, and away from fabric that could trap heat.
Ventilation matters more than most people expect. A sheet roof traps warm air quickly, especially with two people inside. Keep one end open, leave a small gap along one side, or lift the sheet slightly at the entrance. If the fort feels hot or stuffy, open it up rather than adding another layer.
Pillow Fort Ideas for Kids, Teens, and Adults
The same basic build works for different ages, but the purpose changes. For young children, the fort is a play space. Keep it low, keep the entrance wide, and keep an adult nearby. Children are more likely to climb on walls, pull at the roof, and hide inside, so stability and supervision matter more than size.
For older children and teens, the fort is often a reading nook, a movie spot, or a sleepover base. They usually want more room for a laptop, headphones, snacks, and a friend. A headboard tunnel with a clear entrance and a place to charge a device outside the fort works well.
For adults, a bed fort is usually about comfort rather than play. A low fort with soft lighting, a good book, and space to stretch out can turn an ordinary evening into a quiet retreat. Keep the build simple, use pillows you already own, and do not turn the bed into a structure that is hard to get out of at night.
For a sleepover, build the fort early and test it before guests arrive. Leave the sleeping area clear, keep walkways around the bed free, and agree on a simple rule: if the fort falls, rebuild it together rather than pulling at the sheet while someone is inside.
Is It Safe to Sleep in a Pillow Fort on Your Bed?
For most older children, teens, and adults, a short nap or a sleepover in a well-ventilated bed fort is generally fine if the structure is low, the entrance stays open, and no one is trapped under heavy fabric. The fort should never feel airtight, and anyone inside should be able to get out quickly without help.
There are clear limits. Do not build a fort for a baby or a very young child to sleep in. Infants should not sleep on soft bedding, pillows, or thick quilts, and they should not sleep in an enclosed space made from loose fabric. The U.S. Consumer Product Safety Commission explains that bare is best for babies, with no pillows, blankets, or extra padding in the sleep area.
For older children, an adult should check the fort before sleep, make sure the roof cannot fall across a child’s face, and keep the room at a comfortable temperature. If a child feels hot, restless, or uncomfortable, take the roof down and let them sleep in the open bed.
Warning
Never use candles, oil lamps, or any open flame inside a pillow fort. Bedding and sheets can catch fire quickly. Use battery-operated lights only, and keep chargers and power banks outside the fort where they can stay cool.
Other safety points are simple but important. Do not block a bedroom door or a clear path to the door. Do not build a fort so tall that it could fall onto someone below the bed. Do not use heavy furniture, bookshelves, or unstable chairs as part of the structure. And do not leave a fort up for days if it blocks light, air, or access to the bed.
Common Mistakes That Make a Bed Fort Collapse
Most collapses follow the same pattern. The walls are too tall, the roof is too heavy, or the base is uneven. Fixing one of those three things usually fixes the fort.
Building walls too high is the most common mistake. A wall made from three soft pillows stacked on top of each other has no support in the middle. It leans, then falls. A wall made from two firm pillows, with a smaller pillow filling the gap, is shorter but much stronger.
Using the wrong pillows is another common problem. Soft, flat pillows are comfortable, but they do not hold a wall. If you only have soft pillows, stack them flat in layers like sandbags instead of standing them upright. Lay one row flat, then another row on top, slightly offset. This creates a low, wide wall that is harder to knock over.
Pulling the sheet too tight is also a problem. A tight sheet pulls the walls inward and puts constant pressure on the clips. A sheet with a little slack can move slightly without pulling a wall down.
Finally, many forts fail because the bed is not against a solid support. If the bed can move, the fort can move. Push the bed firmly against the wall or headboard before you build, and check that the mattress does not slide when someone climbs in.
How to Take the Fort Down and Keep the Bedding Clean
Taking the fort down is faster if you do it in reverse. Remove lights and loose items first, then take down the roof sheet, then the walls, then the floor blanket. This stops pillows from falling onto a tablet, a drink, or a light.
Shake the sheet outside or over the bed to remove crumbs and dust. Fold blankets rather than stuffing them back into a cupboard, so they keep their shape. If pillows were used on the floor or as walls, check the pillowcases for marks before putting them back on the bed.
Bed pillows used in a fort often pick up dust, pet hair, or snack crumbs. If they need a wash, follow the care label and use a gentle cycle where the pillow allows it. Our guide to how to wash a bed pillow explains which pillows can go in a washing machine and how to dry them completely, which matters because a damp pillow can develop a smell quickly.
For everyday cleaning between washes, a quick vacuum with an upholstery attachment or a lint roller can remove surface dust. A guide to how to clean a bed pillow is useful if a pillow has a stain or a smell after being used as a fort wall.
If you plan to use the same bedding for the fort often, keep a spare flat sheet and a spare set of pillowcases for fort use. That way, the fort does not wear out your everyday bedding, and you can wash the fort set separately.
Bed Forts in Small Rooms and Dorm Rooms
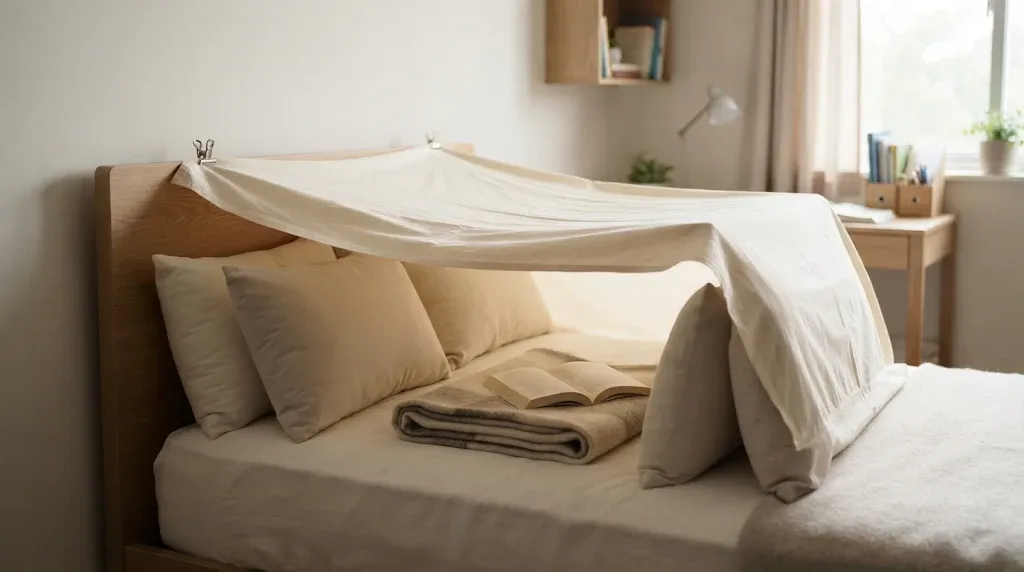
A bed fort works especially well in a small bedroom or dorm room because the bed is already the largest piece of furniture. You do not need floor space for chairs or a separate frame. The bed itself is the frame.
In a dorm room, use the wall behind the bed and the headboard as your main supports. Keep the fort low so it does not block a window, a desk light, or a roommate’s side of the room. Use clips rather than tape or pins, which can damage walls and bedding.
Bedding choice also helps. A light, breathable sheet makes a better roof in a warm dorm room than a heavy comforter. If you are choosing new bedding for a small room, a guide to dorm room bedding can help you pick sheets and blankets that are easy to wash, easy to fold, and comfortable for both sleeping and fort building.
In a shared room, agree on a time to take the fort down. A fort that stays up for days can make the room feel cramped and can make it harder to change the sheets or clean under the bed.
Related Product
Pillow Fort Building Kit
A fort building kit with clips and connectors can make the roof and walls more stable than books and loose clips alone, especially for repeated builds.
As an Amazon Associate, we earn from qualifying purchases.
Frequently Asked Questions
How many pillows do I need for a pillow fort on my bed?
For one or two people, 4 to 6 firm pillows for the walls and 2 to 4 soft pillows for the inside is usually enough. Use the firmest pillows for the walls and save soft pillows for comfort. If you only have soft pillows, stack them flat in layers instead of standing them upright.
What is the best sheet to use for a pillow fort roof?
A large, light flat sheet works best. It is light enough to stay up without pulling the walls inward, and it lets some air and light through. Avoid heavy blankets or duvets for the roof, and use those on the floor instead.
How do I make a pillow fort on my bed without chairs?
Use the headboard and the mattress as the frame. Stand firm pillows along the sides of the bed, fill gaps with smaller cushions, drape a light sheet over the top, and anchor it with clips, books, or tucked edges. A low, wide fort is more stable than a tall one without chairs.
Can adults sleep in a pillow fort on a bed?
Yes, if the fort is low, well ventilated, and easy to leave. Keep the entrance open, use battery lights only, and make sure the roof cannot fall across your face. Do not use a fort for a baby or very young child to sleep in, and take the roof down if you feel hot or uncomfortable.
How do I stop my pillow fort from falling down?
Keep the walls low and wide, use firm pillows at the bottom, fill gaps, and use a light sheet for the roof. Anchor the sheet at two opposite corners and shorten the span if the bed is wide. Test the fort by leaning gently against each wall before you add decorations.
Is it safe to use fairy lights inside a pillow fort?
Battery-operated LED fairy lights are generally the safest option because they stay cool and have no flame. Do not use candles, oil lamps, or mains-powered lights that can get hot. Keep lights away from the sheet, keep the entrance open, and turn lights off when you leave the fort.
Conclusion
A pillow fort on your bed works best when it is low, wide, and simple. Use the headboard as your back wall, build firm side walls, drape a light sheet over the top, and anchor it in two places. Leave the entrance open, add soft pillows and battery lights inside, and test the structure before you settle in. That approach gives you a cosy fort that stays up, feels comfortable, and is easy to take down when you are done.

I’m a home decor enthusiast who loves discovering beautiful room ideas, creative DIY projects, and Pinterest-worthy decorating inspiration. At DecorMinty, I share simple tips, fresh trends, and practical ideas to help you create a home you’ll truly love—one room at a time.