How to Make a Bed Pillow Sham: Step-by-Step Sewing Guide
Quick Answer
To make a bed pillow sham, cut one front panel and two overlapping back panels from prewashed fabric, add about 2 inches around the pillow for the flange and seams, hem the back edges, sew the layers together with a 1/2-inch seam, then turn the sham right side out, press it flat, and insert the pillow through the envelope back.
A pillow sham turns a plain pillow into the finished layer at the front of a made bed. It is one of the simplest sewing projects for a bedroom, because the shape is a rectangle, the closure is hidden at the back, and most of the skill is in measuring, cutting straight, and pressing well.
What a Bed Pillow Sham Is
A bed pillow sham is a decorative cover for a pillow that is displayed on a made bed. Unlike a pillowcase, it is not meant for sleeping. It usually opens at the back, through an envelope overlap or a hidden zipper, so the front stays smooth. Most shams also have a flange, a flat border of fabric around the edge that frames the pillow like a mat around a photograph.
Saatva explains what a pillow sham is as a decorative cover that turns an ordinary sleeping pillow into part of the bed design, with a back opening and a flange border. That distinction matters when you choose fabric. A sham can use a heavier cotton, linen, or velvet that would feel less comfortable against skin all night, because it is removed before sleep.
Choose Your Sham Size and Style First
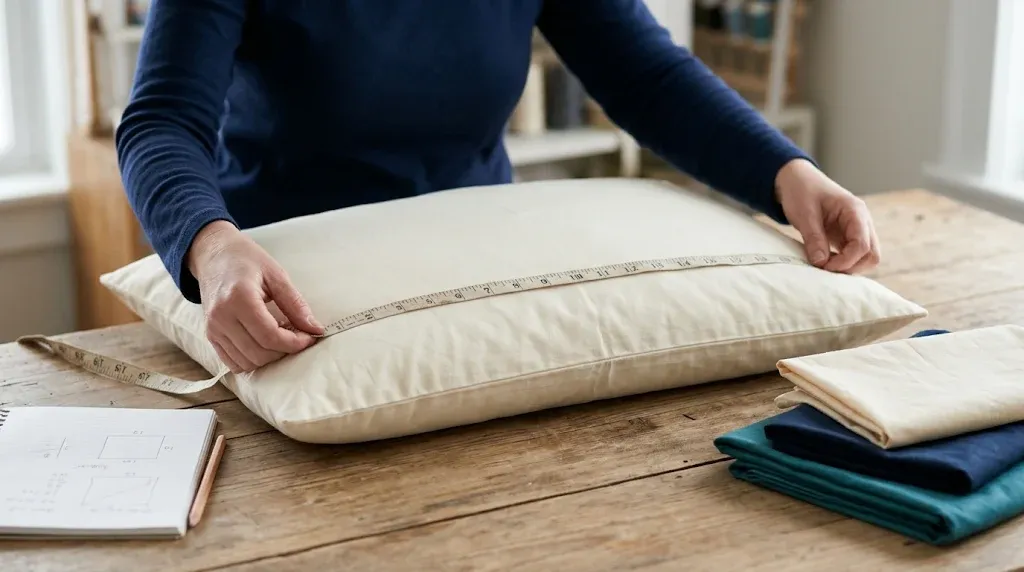
Measure the pillow you will actually use, not the size on a shop label. Pillows soften and spread with use, so measure across the middle, from seam to seam, while the pillow is lying flat. If the pillow is very full, choose the next size up rather than forcing it into a tight cover.
| Sham size | Pillow it fits | Finished size, with flange |
|---|---|---|
| Standard | 20 x 26 inches | About 24 x 30 inches |
| King | 20 x 36 inches | About 24 x 40 inches |
| Euro | 26 x 26 inches | About 30 x 30 inches |
The finished sizes above allow about 2 inches on each side for a flange. A 1-inch flange looks casual, while a 2- to 3-inch flange looks more formal and gives the sham its classic framed shape. Check standard bed pillow measurements before you cut, and compare them with our guide to bed pillow sizes if you are mixing sizes on one bed.
Fabric, Tools, and Supplies You Need
Choose a fabric that presses well and holds a crease. Cotton, cotton-linen blends, linen, and percale are the easiest for a first sham. Avoid very slippery satin, stretchy jersey, and heavy upholstery fabric for now, because they shift while you sew and make the flange harder to press flat.
For a standard sham, buy about 1 1/4 yards of 54- to 60-inch-wide fabric, or 1 1/2 yards of 44-inch-wide fabric. A Euro sham needs about 1 1/2 yards of wide fabric. Buy a little extra if the pattern has a large repeat, or if you want the pattern centred on the front. Prewash and press the fabric as you will wash the finished sham, because cotton and linen can shrink after the first wash.
You will also need matching thread, sharp scissors or a rotary cutter, a ruler or measuring tape, pins or clips, an iron, a sewing machine, and the pillow insert. An envelope back needs no zipper or buttons, which keeps the supply list short.
How Much Fabric to Cut
Cutting is where most shams succeed or fail. Work on a clean, flat surface, keep the fabric grain straight, and cut with the pattern facing the way you want it to appear on the bed.
For a standard sham with a 2-inch flange, cut the front panel 25 x 31 inches. That is the 20 x 26-inch pillow, plus 1 inch for seam allowance on each side, plus 2 inches for the flange on each side. Cut two back panels the same width, 25 inches wide, and about 19 inches long each, so they overlap by about 7 inches in the middle. That overlap keeps the pillow hidden and stops the back from gaping open.
For a Euro sham, cut the front 31 x 31 inches and each back panel 31 x 22 inches. For a king sham, cut the front 25 x 41 inches and each back panel 25 x 24 inches. Write the numbers on a scrap of paper and tape it to the table, so you can check them while you cut.
Tip
Cut the front panel first, then cut the back panels from the same piece. Check the pattern direction before you cut anything else.
How to Make a Bed Pillow Sham Step by Step
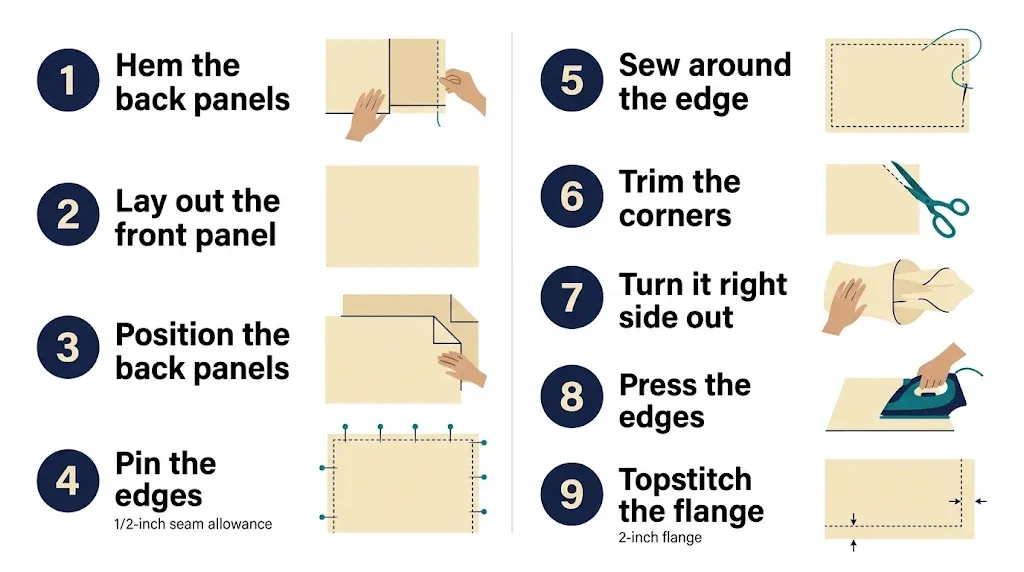
Use a straight stitch and a 1/2-inch seam allowance throughout.
- Hem the back panels. Fold one long edge of a back panel under by 1/2 inch, press it, fold it under by another 1/2 inch, press again, and sew close to the inner fold. Repeat for the second panel.
- Lay out the front panel. Place it right side up, smooth it flat, and check that the pattern is the right way up and the corners are square.
- Position the back panels. Lay the first back panel right side down over the front, lining up the top, bottom, and one side. Lay the second panel right side down over the other side, so the hemmed edges overlap by about 7 inches in the centre.
- Pin the edges. Pin or clip around all four sides, through all layers. Pay extra attention where the back panels overlap, because that spot shifts easily.
- Sew around the edge. Sew around the whole rectangle with a 1/2-inch seam allowance, backstitching at the start and end. Do not sew across the envelope opening in the middle.
- Trim the corners. Trim the seam allowance at each corner at a diagonal, leaving about 1/4 inch from the stitching. This removes bulk and helps the corners turn out sharp.
- Turn it right side out. Reach through the envelope opening and turn the sham right side out. Push the corners out gently with a blunt tool, such as a chopstick, not scissors.
- Press the edges. Press the sham flat from the front, rolling the seam slightly to the back so it does not show. Press the corners until they lie crisp and square.
- Topstitch the flange. Measure 2 inches in from the outer edge on all four sides, mark the line, and sew along it through the front and back layers. Insert the pillow through the back opening and smooth the flange with your hands.
If the sham feels tight, check the pillow size first. A pillow fuller than the measurement you used will pull the flange in and make the sham look small. A slightly larger sham is easier to fix than a tight one, because you can take in a seam, but you cannot add fabric back.
How to Add a Flange That Stays Flat
A flange only looks good when it lies flat. The most common cause of a floppy flange is skipping the press before topstitching. Press the sham well after turning it right side out, then press it again after you mark the flange line.
Topstitch slowly and keep the fabric flat under the presser foot. If the flange puckers, pin the flange line every few inches, or use a walking foot if your machine has one.
Common Mistakes to Avoid
The first mistake is cutting the front panel to the pillow size without adding seam allowance and flange width. The sham then fits like a tight pillowcase and the flange disappears. The second is making the back overlap too small. An overlap of 3 or 4 inches may look neat on the table, but it gaps open once the pillow is inside. Aim for 6 to 8 inches.
The third mistake is sewing the back panels right side up, so the hems end up on the outside. Always lay them right side down on the front panel.
How to Finish, Style, and Care for Your Sham
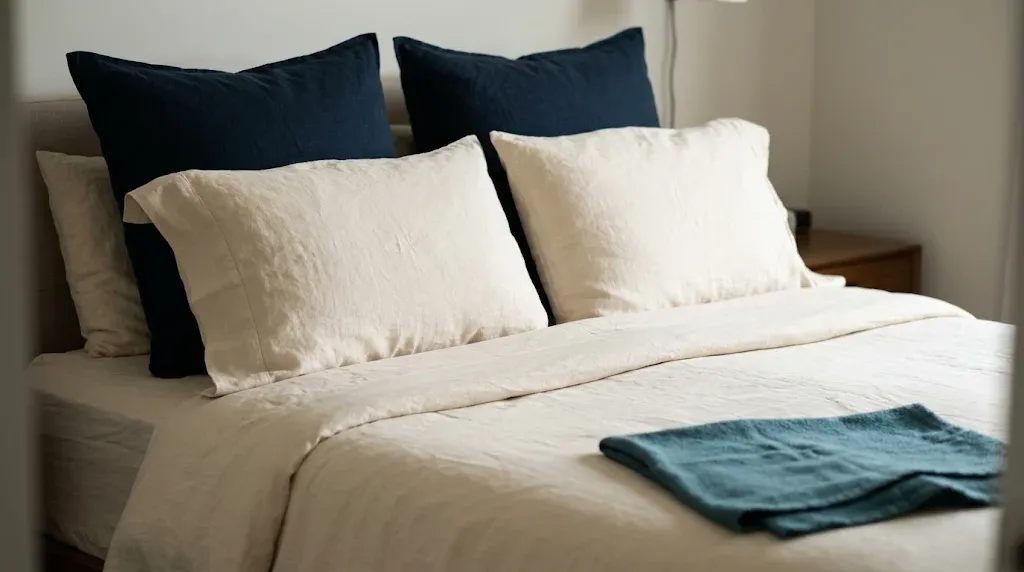
Once the pillow is inside, stand the sham up and check it from the front. The flange should be even on all four sides, the pattern should be centred, and the back opening should be hidden.
Style standard shams in front of the sleeping pillows, with the flange showing. Place Euro shams against the headboard as the back layer, then standard shams in front of them. Remove shams at night and store them flat, so the flange does not crease unevenly.
Wash a cotton or linen sham in cold or warm water on a gentle cycle, as you would a pillowcase. Read how to wash a bed pillow before you wash the pillow itself, because the insert and the cover have different care needs. For stains on the cover, see how to clean a bed pillow and treat the stain before washing. Press the sham while it is still slightly damp for the crispest finish.
Related Product
Cotton Fabric for a Pillow Sham
A medium-weight cotton that presses well makes the flange crisp and the envelope back easy to sew.
As an Amazon Associate, we earn from qualifying purchases.
Frequently Asked Questions
How much fabric do I need to make a standard pillow sham?
About 1 1/4 yards of 54- to 60-inch-wide fabric is enough for one standard sham, or 1 1/2 yards of 44-inch-wide fabric. Buy a little extra if the pattern has a large repeat.
What is the difference between a pillow sham and a pillowcase?
A pillowcase covers the pillow you sleep on and opens at one end. A sham is a decorative cover that opens at the back, usually with an envelope overlap, and has a flange border. Shams are displayed during the day and removed at night.
Can I make a pillow sham without a sewing machine?
Yes, you can hand-sew a sham with a backstitch, but it will take longer and the flange is harder to keep even. A sewing machine gives a stronger, straighter seam, so use one if you can borrow one.
How wide should the flange be on a pillow sham?
A flange of 1 to 3 inches works for most shams. Use 1 inch for a casual look, 2 inches for the classic framed look, and 3 inches for a more formal sham. Keep the width the same on all four sides.
Should I wash fabric before sewing a pillow sham?
Yes. Prewash and press cotton and linen fabric in the same way you will wash the finished sham. This removes shrinkage before you cut, so the sham still fits after the first wash.
How do I keep a pillow sham from looking lumpy?
Trim the corners, press the sham well after turning it right side out, and topstitch the flange through flat layers. Use a pillow that fits the finished size, and smooth the fill evenly inside the cover.
Conclusion
A good pillow sham is mostly good measuring. Choose the size, add seam allowance and flange width, cut the front and two overlapping back panels, hem the back edges, and sew the rectangle together. Press it well, topstitch the flange evenly, and the finished sham will look neat from the front and stay closed at the back.
Make the first one in a plain, easy fabric. Once the envelope back and flange feel familiar, the same steps work for a Euro sham, a king sham, or a patterned front that matches the rest of the bed.

I’m a home decor enthusiast who loves discovering beautiful room ideas, creative DIY projects, and Pinterest-worthy decorating inspiration. At DecorMinty, I share simple tips, fresh trends, and practical ideas to help you create a home you’ll truly love—one room at a time.