How to Make a Pillow for Your Bed: Easy DIY Guide
Quick Answer
To make a pillow for bed, cut two fabric pieces 1 inch larger than the finished size, sew them right sides together with a ½-inch seam, leave a small opening, turn the cover right side out, add filling in small handfuls, then close the opening with a ladder stitch. A standard pillow finishes at 20 x 26 inches, so cut each piece 21 x 27 inches.
Making a bed pillow is a good first sewing project because the shape is simple, the steps are short, and the result is useful every night. You control the size, fabric, firmness, and colour, which is useful when shop pillows feel too flat, too high, too warm, or wrong for your bedding.
The basic method is the same whether you sew by machine, sew by hand, or use a no-sew method. You make a fabric shell, fill it evenly, and close it neatly. The choices that change the result most are the pillow size, the fabric weave, and the filling. Get those three right and the rest is mostly careful measuring and slow, even stitching.
What Kind of Pillow Are You Making?
Before you cut anything, decide whether you want a pillow you sleep on or a pillow that mainly decorates the bed. A sleeping pillow needs a washable cover, a breathable fabric, and a filling that keeps its shape through the night. A decorative pillow can use heavier fabric, a firmer insert, and a finish that would be less comfortable against skin.
Most people making a bed pillow want one of three things. The first is a simple sewn pillow with loose filling, closed permanently. The second is a removable cover with an inner pillow, which is easier to wash and adjust. The third is a no-sew pillow, usually made with fleece, fabric glue, or iron-on tape.
The sewn method below makes a complete pillow. If you want a removable cover instead, make the same shell with a zipper or envelope back, then slide a ready-made insert inside. That version is practical if you change pillowcases often or want to wash the cover without washing the filling.
Choose the Right Pillow Size First
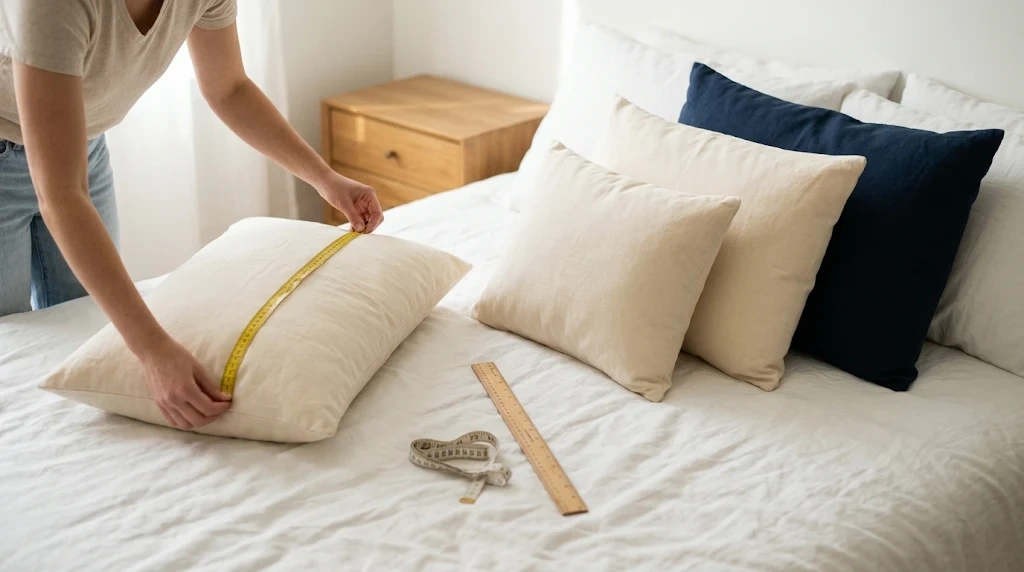
Start with a standard bed-pillow size so a normal pillowcase fits. A pillow made to an unusual size can look good, but it is harder to dress, harder to wash, and harder to replace. If you are making a pair for a double, queen, or king bed, measure the width across the head of the bed first and check how two pillows will sit side by side.
Our guide to how big a standard bed pillow is explains the common sizes and how they fit different beds. Use the finished size below, then add 1 inch to both measurements for the seam allowance.
| Pillow type | Finished size | Cut each piece |
|---|---|---|
| Standard | 20 x 26 inches | 21 x 27 inches |
| Queen | 20 x 30 inches | 21 x 31 inches |
| King | 20 x 36 inches | 21 x 37 inches |
| Euro | 26 x 26 inches | 27 x 27 inches |
The cut size already includes a ½-inch seam allowance on every side. If you use a different seam allowance, adjust the cut size by the same amount. For a small decorative bed pillow, 18 x 18 inches finished is a common choice; cut two 19 x 19 inch pieces.
Pick a Fabric and Filling That Work Together
Fabric and filling are not separate choices. A loosely woven fabric can let small, loose filling escape through the weave, while a stiff fabric can make a soft filling feel hard. For a sleeping pillow, choose a tightly woven cotton, cotton sateen, or cotton percale. These fabrics breathe, feel smooth, and hold loose filling better than open-weave linen or gauze.
For a decorative pillow, you have more freedom. Velvet, linen, canvas, and upholstery fabric all work, but check the care label first. A fabric that cannot be washed is a poor choice for a pillow that will be slept on, even if it looks good on the bed.
Pre-wash washable fabric before cutting, especially cotton. Fabric can shrink after the first wash, and a pillow sewn from unwashed fabric may pucker or become smaller than the pillowcase. Press it after washing so your measurements stay accurate.
| Filling | Feel | Best for |
|---|---|---|
| Polyester fiberfill | Soft, light, and fluffy | Beginners and budget projects |
| Down or feather | Plush and mouldable | A soft, traditional sleeping pillow |
| Shredded latex | Springy and supportive | Adjustable height and firmness |
| Buckwheat hulls | Firm and adjustable | A structured pillow with a zipper |
| Wool | Natural and breathable | A quieter, temperature-stable pillow |
As a rough guide, a standard pillow needs about 16 to 20 ounces of polyester fiberfill for medium firmness. Down and feather need a little more by weight for the same size, while shredded latex and memory-foam pieces are much heavier. Fill slightly more than you think you need, because loose filling settles and compresses during the first weeks of use.
Loose filling such as buckwheat hulls or shredded latex works best in a pillow with a zipper. That way you can add or remove filling later without opening a seam. For a permanently closed pillow, polyester fiberfill is usually the simplest choice.
What You Need Before You Start
You do not need specialist equipment for a basic bed pillow. A sewing machine makes the work faster and the seams stronger, but a hand-sewn pillow is possible if you use small, even stitches and backstitch at the start and end of each seam.
- Fabric, pre-washed and pressed if washable
- Matching thread
- Filling or a ready-made pillow insert
- Scissors or a rotary cutter
- Pins or fabric clips
- Measuring tape and a ruler
- Fabric chalk or a washable marker
- Hand-sewing needle
- Iron
- Optional: zipper, piping cord, or iron-on tape for a no-sew version
Choose a thread colour that matches the main fabric, not the filling. A matching thread makes small stitching errors less visible, especially on the final closing seam. If your fabric has a pattern, decide which part of the pattern should sit in the centre of the front panel before you cut.
How to Make a Sewn Bed Pillow, Step by Step
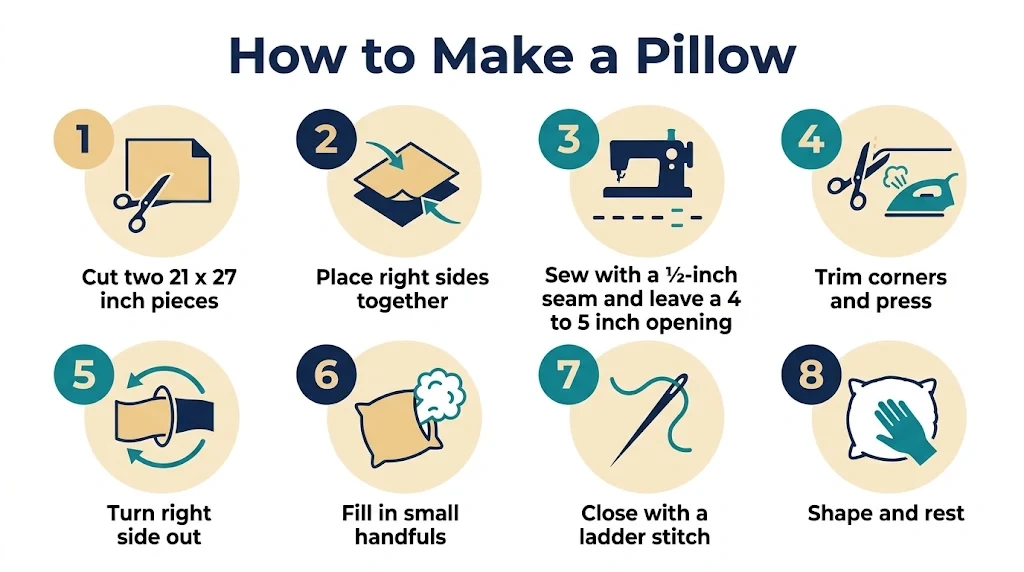
This method makes one standard pillow with loose filling. It takes most beginners about 45 to 90 minutes, not counting fabric washing and drying.
1. Measure and cut the fabric
Measure and mark two rectangles using the cut size for your chosen pillow. For a standard pillow, mark two 21 x 27 inch pieces. Cut carefully along the marked lines, keeping the fabric flat so the pieces stay the same size. If the fabric has a clear right side, mark it lightly so you do not mix the sides up later.
2. Place the pieces right sides together
Lay one piece right side up. Place the second piece on top, right side down, so the right sides face each other. Line up the edges and corners, then pin around three sides. Leave one short side partly open for turning and stuffing. A 4 to 5 inch opening is enough for a standard pillow.
3. Sew around the edges
Sew around the pinned edges with a ½-inch seam allowance and a straight stitch. Backstitch at the start and end of the seam so it does not pull open. Stop at the opening, backstitch, and leave that section unsewn. Keep the seam line even; a wobbly seam can make one side of the pillow shorter than the other.
Tip
Sew slowly around the corners and stop with the needle down when you turn the fabric. That keeps the corner sharp and the seam allowance even on both sides.
4. Trim the corners and press the seam
Trim the fabric at each corner at an angle, leaving about ⅛ inch of fabric beyond the stitching. This removes bulk so the corners turn out flat instead of rounded and lumpy. Do not cut through the stitches. Press the seam allowance open or to one side with an iron, keeping the opening edges folded in by ½ inch so they are ready to close later.
5. Turn the shell right side out
Reach through the opening and turn the shell right side out. Use a blunt tool, such as a chopstick or the rounded end of a pen, to push each corner out gently. Do not use scissors or a sharp point, which can poke through the seam. Press the pillow flat again, making sure the folded opening edges stay turned in.
6. Add the filling in small handfuls
Pull the filling apart into small, loose pieces before you put it in. Stuff the corners first, then work toward the centre, adding a handful at a time. This prevents large clumps and empty pockets. Check the shape often by holding the pillow up and pressing it flat. A pillow that looks full when it is lying down can still have thin spots in the middle.
For a standard pillow, start with about 16 ounces of polyester fiberfill and add more until the pillow feels slightly firmer than you want. It will soften as the filling settles. If you are using an insert instead of loose filling, slide it in and smooth the cover over it before closing.
7. Close the opening with a ladder stitch
Pin the opening closed, matching the folded edges. Use a hand needle and matching thread to sew a ladder stitch, also called an invisible stitch. Take a small stitch along one folded edge, then a small stitch along the other, pulling the thread gently after every few stitches so the seam closes without puckering. Knot the thread at the end and hide the tail inside the pillow.
A ladder stitch is worth learning for this step because it leaves almost no visible seam. A machine topstitch is faster, but it leaves a visible line across the edge and can catch the filling if the opening is not held flat.
8. Shape and rest the pillow
Fluff the pillow by shaking it gently, then press it flat on the bed and check both sides. Push filling toward any thin area and pull it away from any overfilled corner. Leave the pillow flat for a few hours before you put a pillowcase on it. This gives the filling time to settle and makes it easier to see whether the shape needs a small adjustment.
How to Make a No-Sew Bed Pillow
A no-sew pillow is useful if you do not have a sewing machine or do not want to sew. It will not be as strong as a sewn pillow, so it suits a decorative pillow or a light-use pillow better than a pillow slept on every night. Choose fleece for the simplest version, because fleece does not fray.
- Cut two pieces of fleece a few inches larger than the finished pillow size.
- Cut a small square from each corner so the fringe does not bunch up.
- Cut fringe around all four edges, about 3 to 4 inches long and ½ inch wide.
- Lay the pieces together and tie matching fringe strips into double knots around three sides.
- Insert a pillow form or loose filling through the open side.
- Tie the last side closed and fluff the pillow into shape.
For a smoother look without fringe, use fabric glue or iron-on hem tape. Lay the fabric pieces inside out, join three edges with glue or tape, turn the cover right side out, add the filling, then seal the last edge. Iron-on tape is the stronger no-sew option, but follow the tape instructions carefully and test it on a fabric scrap first. Fabric glue needs time to dry fully, usually overnight, before you stuff the pillow.
Hot glue can work on a small decorative pillow, but it can feel stiff and may not survive washing. Use it only for a pillow that will not be washed often, and keep the glue line thin and even.
Add a Zipper or Envelope Back Instead
A zipper or envelope back turns the same project into a removable cover. This is the better choice if you want to wash the cover, change the filling, or use one insert with different covers through the year.
For a zipper cover, sew the zipper into one long edge before you sew the other three sides. Use a zipper at least as long as the side it sits on, and keep the zipper pull inside the seam when you finish. For an envelope cover, cut the back in two overlapping pieces instead of one. Each back piece should be about two-thirds of the finished width, so they overlap in the middle and hold the insert in place.
A removable cover also solves the most common filling problem: a pillow that is too flat or too high. You can open it, add or remove filling, and close it again in a few minutes. That adjustment is much harder with a permanently closed pillow.
How to Fix a Pillow That Feels Wrong
Most homemade pillows fail in the same few ways, and most of them are fixable before the pillow is finished. Check the shape while you are still stuffing it, not after the opening is closed.
If the pillow feels lumpy, the filling was added in large clumps. Pull some filling out, break it into smaller pieces, and put it back in slowly. If the corners look empty, push small pieces of filling into each corner first, then fill the centre. If the pillow feels flat in the middle, add filling there rather than around the edges.
If the pillow feels too high, remove a handful at a time and test it by lying on it for a few minutes. Height that feels fine when you press the pillow with your hand can feel very different under your head. If the pillow feels too low, add filling in small amounts and check again. The Turmerry pillow-making guide also notes that loose fills such as shredded latex and buckwheat hulls are easier to adjust than a fixed insert, which is why a zipper cover is useful for those fills.
If the seam looks wavy, the fabric may have stretched while you sewed. Press the seam flat and check that both pieces are the same size. A small difference in the cut pieces will show up as a twist when the pillow is turned right side out.
Common Mistakes to Avoid
Skipping the seam allowance is the most common mistake. Cutting the fabric to the finished size, rather than 1 inch larger, makes a standard pillow finish at about 19 x 25 inches. It will still work, but a standard pillowcase will fit loosely and the pillow will look smaller on the bed.
Overstuffing is the second common mistake. A pillow stuffed until it is hard will not mould around the head and neck, and the seams will be under strain. Understuffing has the opposite problem: the pillow collapses and the filling moves to the edges. Aim for slightly firm, then let it settle.
Warning
Do not use a pillow made for an adult bed as a pillow for a baby or small child. Keep a homemade pillow away from a baby’s sleep area unless a doctor or safe-sleep guidance says otherwise for that child’s age and situation.
Other mistakes are easy to prevent. Do not use a fabric that frays badly without finishing the edges, do not leave the opening too small to stuff through, and do not close the opening before you have checked the shape on both sides. A few minutes of checking at that stage saves opening the seam later.
How to Wash and Care for a Homemade Pillow
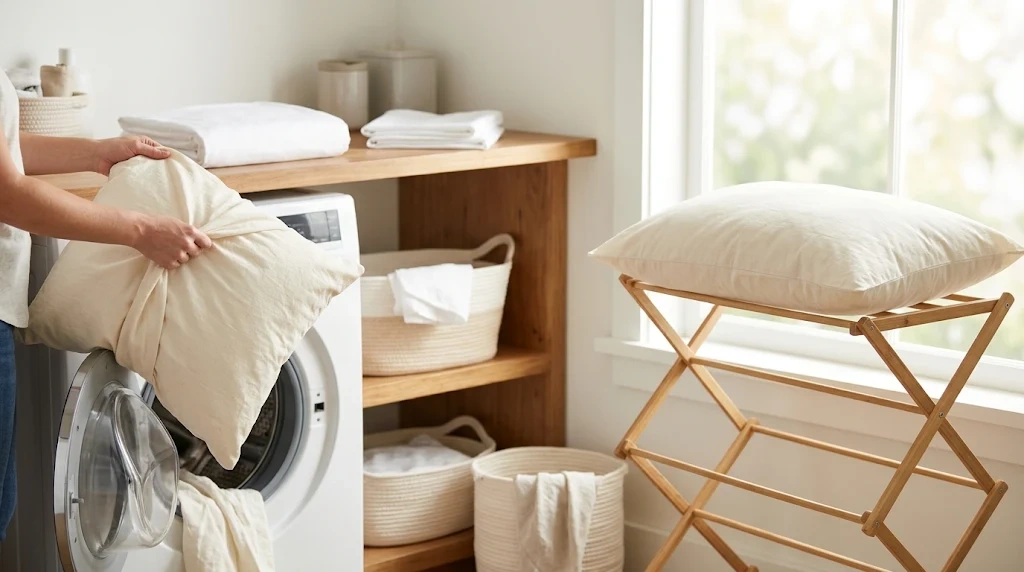
Care depends on the filling, not just the fabric. A polyester fiberfill pillow can usually be machine washed on a gentle cycle, but check the fabric and filling labels first. Our guide to how to wash a bed pillow covers the steps by pillow type, including when hand washing is safer.
Drying matters as much as washing. A pillow that stays damp in the centre can develop a musty smell. Our guide to how to dry a bed pillow explains how to check that the centre is fully dry. If you made a removable cover, wash the cover separately and spot-clean the insert when you can. For day-to-day care, use a pillow protector under the pillowcase and air the pillow regularly. Our guide to how to clean a bed pillow also covers stain and odour care without washing the whole pillow every time.
Replace the filling, not the whole pillow, when a sewn pillow with a zipper starts to feel flat. For a permanently closed pillow, fluff it daily and replace it when it no longer springs back after fluffing.
Related Product
Polyester Fiberfill Stuffing
A bag of polyester fiberfill gives you enough soft, even filling for a standard bed pillow, with extra left over to adjust the firmness.
As an Amazon Associate, we earn from qualifying purchases.
Frequently Asked Questions
How much fabric do I need to make a standard bed pillow?
For one standard pillow, you need enough fabric for two 21 x 27 inch pieces. That is about 1 yard of 44-inch-wide fabric, allowing for cutting and a small margin. Buy a little extra if the fabric has a large pattern you want to centre.
Can I make a bed pillow without a sewing machine?
Yes. You can sew the seams by hand with a small running stitch and backstitch, or make a no-sew pillow with fleece fringe, fabric glue, or iron-on tape. A hand-sewn pillow takes longer, but it can be just as strong if the stitches are small and even.
What is the best filling for a homemade bed pillow?
Polyester fiberfill is the best starting point for most beginners because it is soft, light, inexpensive, and easy to shape. Shredded latex or buckwheat hulls are better if you want to adjust the height later, but they work best in a pillow with a zipper.
How do I stop my homemade pillow from going lumpy?
Add the filling in small, loose handfuls and break up every clump before it goes in. Fill the corners first, then the centre, and check the shape often. A pillow stuffed in large pieces will almost always feel lumpy, even if the total amount is right.
Can I wash a homemade pillow?
It depends on the filling and fabric. Many polyester fiberfill pillows can be machine washed on a gentle cycle, but down, wool, buckwheat, and latex fills need different care. A removable cover is the easiest option because you can wash the cover without washing the filling.
Is it cheaper to make a pillow than to buy one?
Sometimes, but not always. A simple pillow made from inexpensive cotton and fiberfill can cost less than a shop pillow, especially if you already own thread and tools. A pillow made from premium fabric and down filling may cost more than a basic ready-made pillow, but it gives you control over size, fabric, and firmness.
Conclusion
A good homemade bed pillow comes from three simple decisions: the right size, a tightly woven washable fabric, and a filling you can shape evenly. Cut two pieces 1 inch larger than the finished size, sew them with a ½-inch seam, fill in small handfuls, and close the opening with a ladder stitch. If you want to adjust it later, use a zipper or envelope cover instead. Start with a standard pillow in polyester fiberfill, test the height on the bed, and adjust the filling before you call it finished.

I’m a home decor enthusiast who loves discovering beautiful room ideas, creative DIY projects, and Pinterest-worthy decorating inspiration. At DecorMinty, I share simple tips, fresh trends, and practical ideas to help you create a home you’ll truly love—one room at a time.